This week we will work with dslr cameras in-particular, however you are welcome to use your smart phone 🙂 Tips for properly exposing photographs with smart phones and dslr cameras to follow!
Smart Phones
When you point your smartphone camera at a subject or scene, it does it’s best to get you a properly exposed image. You’ve probably noticed though that sometimes it does a better job than others. Sometimes our smartphone cameras want to make our images too dark (underexposed) and sometimes they’re too bright (overexposed). When this happens, you can fix it before taking the picture by adjusting the yellow exposure slider next to the focus square. Just tap the spot on the phone screen where you want to change the exposure and then use the sun icon to increase (slide up) or decrease (slide down) the exposure.
Try This: Take a photo at Sunset and increase the exposure by tapping on the screen.
Proper exposure will make a huge difference in your smartphone photography!
Turn off the Flash
While the flash on smartphones has improved quite a bit over the years, you can’t change the fact that it’s just a small and not very powerful LED light. If you’re shooting at night, whenever possible, turn off the flash and use the camera app’s exposure slider to brighten the photo.
If there’s no available light, you may have no choice but to use flash and that’s ok! A flashy photo is better than no photo at all!
Try This: Take a photo in low light and then take the same photo using the exposure slider to compare.
Proper exposure will make a huge difference in your smartphone photography! If you have any questions, please feel free to contact me!
.jpg)
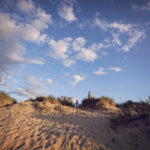
My settings were ISO 400 :|: f 2.0 :|: 1/500s with my canon 5d Mark iv & 50mm f/1.4L USM lens.
DSLR
understanding the exposure triangle
Exposure is the amount of light that is captured when taking a photograph. If you have too much light into your image you will have overexposed the image which will mean it will be too bright. When your camera takes in too little light the image is underexposed or dark. When using a camera with adjustable settings there are three main parts to exposure with which to concern yourself. These three components are the ISO, Shutter and Aperture. When taking a photograph you want your image to be properly exposed. To execute this you must choose the proper ISO, shutter speed and aperture which depends too on your subject and location.
ISO
The acronym ISO stands for International Organization for Standardization. I typically keep this number pretty low and do not mess with my ISO unless my location is dark and needs for me to move my ISO higher to let more light into the sensor. A lower ISO (100 is the lowest) will produce a sharper image. I keep my ISO at 100 when shooting outdoors. A higher ISO makes your camera sensor more light sensitive. This will make your photograph brighter in darker settings but will also create more noise in the photograph. When inside I typically bump my ISO up to help brighten my image unless I like the darker look of silhouettes!
This image needed a higher ISO due to the darkness of the room. Notice that only the window lacks definition which was sacrificed (overexposed) to make sure the subjects were properly exposed. This image was taken with my Canon 5d Mark iv and canon 35mm f/1.4L USM lens.
My settings were ISO 1600 :|: f 2.5 :|: 1/180s
.jpg)
Shutter Speed
When I think of which shutter speed to use I always think about my subject. Much like the ISO but even more so I don’t mess with this setting on my camera much. I typically keep my shutter speed at 1/250s or higher. Its a rare thing for me to change that up. I do move the shutter to 1/2s for fireworks, and have changed it to 1/180s for calm scenes, but typically my subjects are moving and speed is a tool to capture those kiddos who are always on the move.
SO what is shutter speed and what does it do? Shutter speed is the amount of time it takes the mechanical shutter inside our lens to open and close. That click you hear as you take a photograph (with a dslr camera) is your shutter. A short click is a fast shutter speed sound while a long click is a slow shutter speed. It is opening to capture the light and closing when finished. It determines how much light falls on your sensor.
If you are wanting to keep your subject crisp and holding the camera by hand its important to stay above 1/200s for shutter speed. I use a tripod for shutter speeds under 100 to help with camera shake (movement caused by unsteady hands). This means I use a tripod for most night photographs.
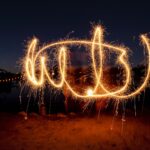
For this image I was at a SLOW Shutter speed to capture the light as it traveled. This image was taken with my Canon 5d Mark iv and canon 16-35mm f/2.8L USM lens.
My settings were ISO 100 :|: f 5.6 :|: 1/10s
.jpg)
Aperture
Aperture is like the iris of your eye. It determines how wide the shutter inside the lens will open to let light inside. You may hear photographers use the term “F-stop” that refers to aperture. The f/stop is lower the wider open the opening. This means 1.2 is a LARGE aperture while 16 is a small aperture. Its a bit backwards when you think of it at first. Your lens will have a Largest and Smallest aperture. A LARGE aperture (1.2) will create the brightest exposure and VERY narrow depth of field (less plane/surrounding in focus). A SMALL aperture (22) would create an extremely wide depth of field/focus plane and would create a darker image.
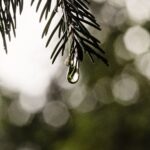
For this image I was at 2.8 for aperture, which is low for me. I generally don’t shoot at anything lower than 2.8. This image was taken with my Canon 5d Mark iv and canon 16-35mm f/2.8L USM lens.
My settings were ISO 400 :|: f 2.8 :|: 1/320s
.jpg)
.jpg)
My settings were ISO 3200 :|: f 6.3 :|: 1/20s
Again, this was shot with my Canon 5d Mark iv and this time my lens was a Sigma 24mm f/1.4 DG HSM ART. This is the comet Neowise that was in the sky between Aug 12-19th.
Want to have a one on one zoom lesson with me to better learn your camera? I have a class for that! Booking here!
Join us!
This is a weekly photography challenge where we learn and grow while we document our year in photographs. Share your weekly photo that is inspired by the prompt on social media with the #EsterCobe52 and we promise to cheer you along! See the main #EsterCobe52 page here or the past weeks below.
- EsterCobe 52 Week 1 :: Phoneography Tips & Tricks with Molly B of Ester Cobe Photography // The Photojournalistic Black + White Photograph

- EsterCobe52 Week 2 // Documenting Dad :: Tips and Tricks on how to capture dad with the kids by Molly B of Ester Cobe Photography

- EsterCobe52 Week 3 // Ideas, Tips and Tricks on Documenting Water

- EsterCobe52 Week 4 // Negative Space in Photography Tips and tricks

- EsterCobe52 Week 5 // Fourth of July!

- EsterCobe52 Week 6 // Document your days

- EsterCobe52 Week 7 // Framing

- EsterCobe52 Week 8 // Documenting Love

- EsterCobe52 Week 9 // Exposure Triangle

- EsterCobe52 Week 10 // Portraits

- EsterCobe52 Week 11 // Connection

- EsterCobe52 Week 12 // Back to School

- EsterCobe52 Week 13 // Macro Photography

- EsterCobe52 Week 14 // Home :: Capturing Life

- EsterCobe52 Week 15 // Composition


